Make a Mould and Deckle for Handmade Paper - Cheap, Quick & Dirty
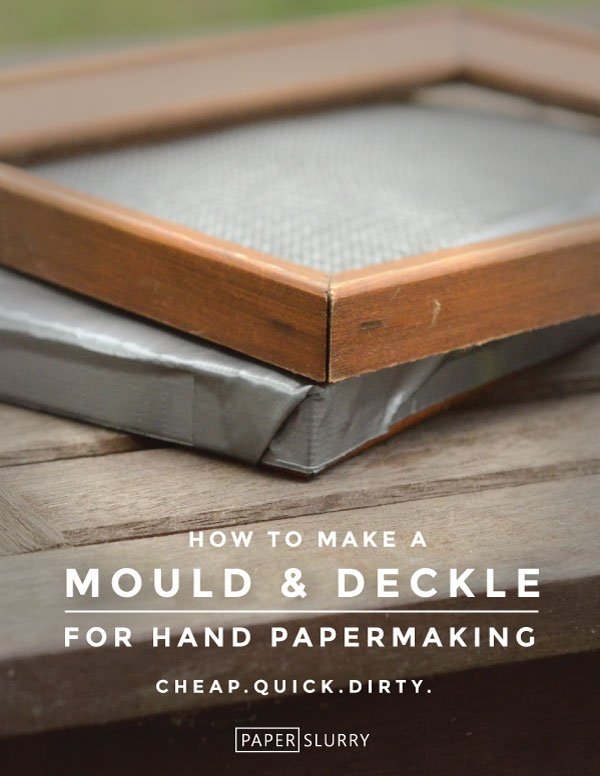
Make handmade paper on the cheap! You may have seen our tutorial on making blender paper from junk mail and scrap papers. Well, here's instructions on how to make a mould and deckle -- it's an essential piece of equipment for the hand papermaking process.
Of course, if you’re allergic to staple guns, you can simply purchase a mould & deckle.
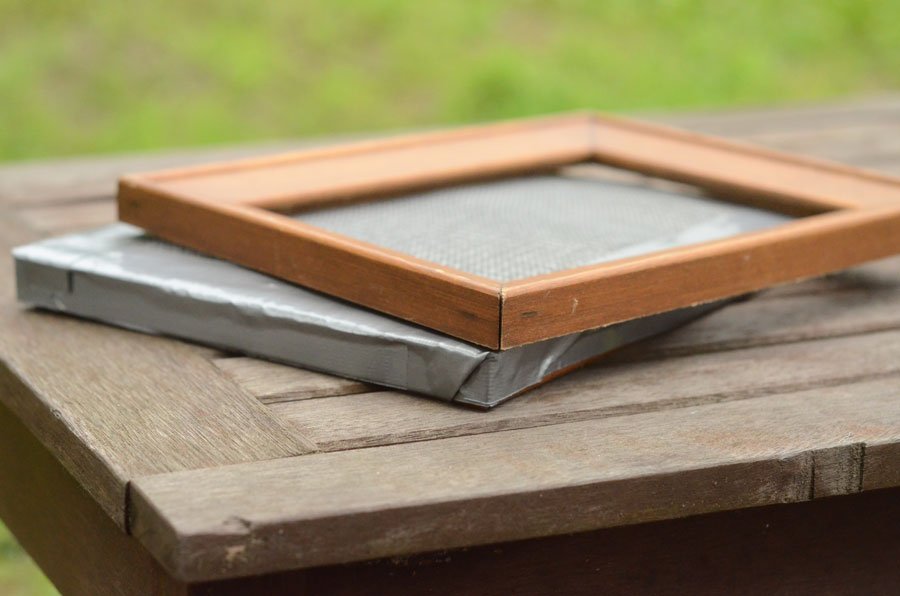
The instructions for this mould & deckle is not exactly beautiful -- actually, it's ugly and doesn’t last too long -- but it sure does the job when you're on a budget! At its most reduced form, a hand mould and deckle (in western style papermaking) is simply 2 separate frames of the same size. One happens to have some sort of screening attached (the mould). The other frame stays loose (the deckle). When the deckle is laid on top of the mould, it forms the edge of a piece of paper.
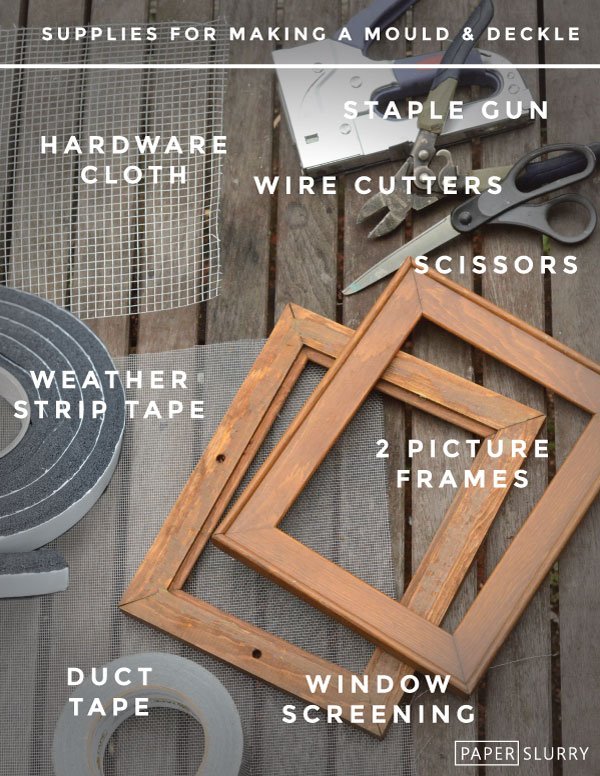
Supplies
2 picture frames - same size, with everything removed - you should be left with just the frames. If you don’t have old picture frames, you can use 2 canvas stretcher bars (paid link).
Hardware Cloth (paid link) - a type of stiff wire mesh used for fencing, screen doors, etc.
Window screening (paid link) - aluminum or fiberglass
Foam Weatherstrip Tape (paid link) - it's adhesive on one side, and usually used for doors & windows
Staple gun & staples
Duct Tape
Wire cutters
Optional: polyurethane & paintbrush
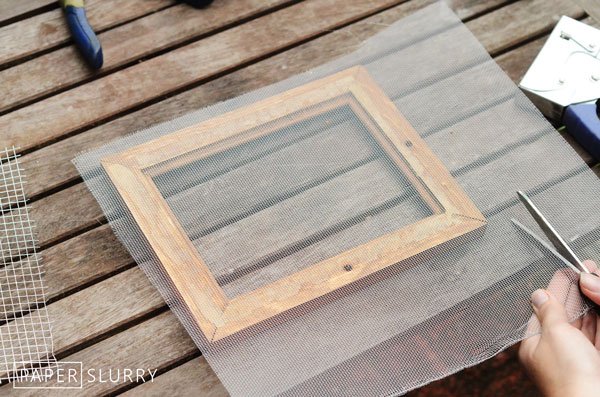
STEP 1: CUT THE SCREENING
Cut down the hardware cloth and window screening, using your wire cutters and junky scissors. You'll want to make them both the same size, and just slightly larger than the picture frame size.
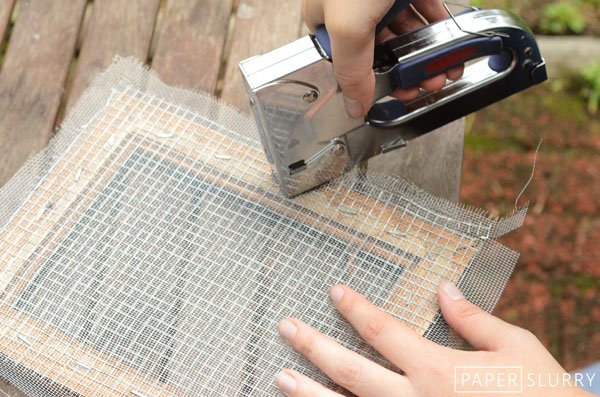
STEP 2: STAPLE
Find the flattest side of one picture frame. Layer the hardware cloth and window screening on the frame. The window screening should be on top.Staple the sandwiched layers to the frame. Make sure the screen layers are flat and taut before you start using the staple gun. A good trick is to first place a staple at the center of each edge. From there, keep going around from side to side, working your way outward from each center staple.
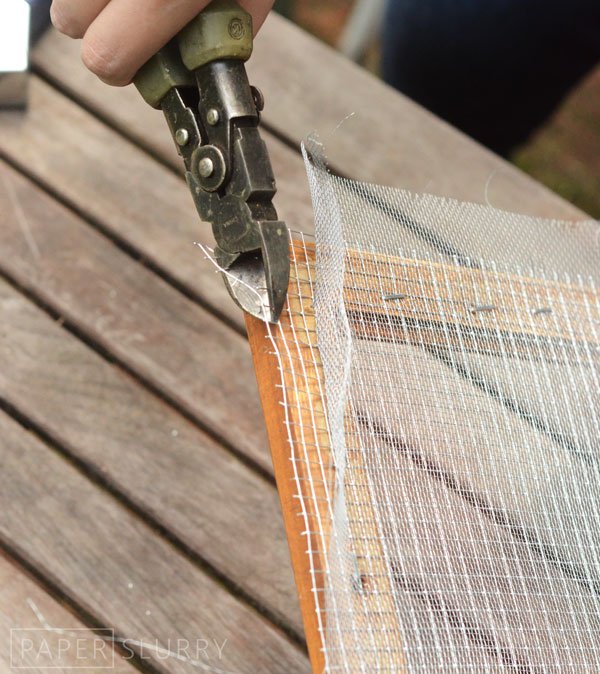
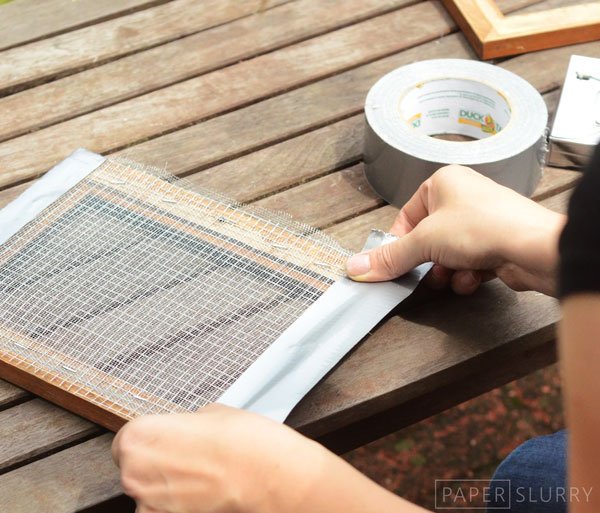
STEP 3: TRIM, DUCT TAPE, & WEATHERSTRIP TAPE
Trim off the excess edges, or any violent-looking wires. Now, time for everyone's favorite fix-it solution -- duct tape! Cover all four edges, making sure not to go past the interior edge of the frame.
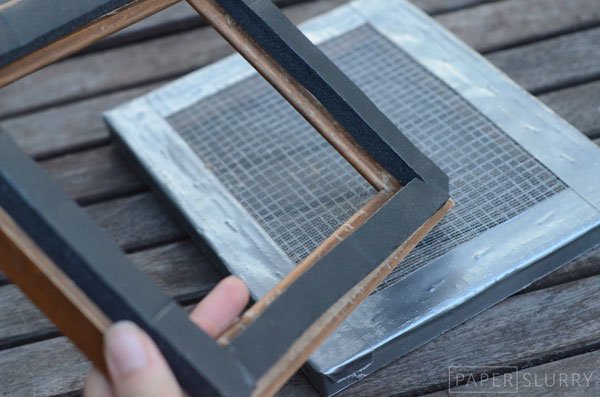
Last but not least - make the deckle! Take the second picture frame (that you haven't touched yet) and apply foam weatherstrip tape. It's adhesive, and you'll want to apply on the flatter backside of the frame, all around the edges. This creates quite a tight seal, and prevents pulp from leaking out between the mould & deckle when you're forming sheets.
This tutorial is good for smaller, hand-sized moulds. For anything bigger than around 8" x 10", the center of the mould might start to sag, causing issues with sheet formation. You can try cutting and gluing a piece of fluorescent lighting egg crate to fit the backside of the mould, for that extra support.
Also, if your frames need it, you can seal the wood with waterproofing polyurethane. Do this after the weatherstrippig is applied, making sure to let the polyurethane dry.
For some essential mould & deckle nerdery:
An awesome article about the amazing Timothy Moore’s traditional western-style moulds.
A write-up by Michael Durgin on the variation in the world of papermaking moulds.
So, what do you do now?
Want to level up your papermaking game? Learn how to make a mould & deckle that doesn’t fall apart or get wonky over time? Turn natural pulp into artistic handmade papers, pulp paintings, sculptures, and more freakin’ cool papermaking artworks?
Hi, I’m May Babcock, a papermaking artist and founder of Paperslurry.com (that’s the website you’re on right now, btw). I’ve created PAPERSLURRY WEEKLY, an email series that will give you papermaking tips and inspiration every week—it’s 100% free!
Enter your email address at the bottom of this page to get started and become a brilliant papermaking artist: